
Congratulations!
You are embarking on an exciting journey as a homeowner and property investor! As you begin the process of officially collecting your keys, there may be some uncertainty about the TOP process and what are the steps to your key collection. Fear not, our goal here is to guide you through the process and make it seamless and stress-free for you.
In this article, let us explore the ins and outs of navigating your brand-new property and help you feel confident in your ownership. Let’s get started!
5 KEY STEPS TO KEY COLLECTION
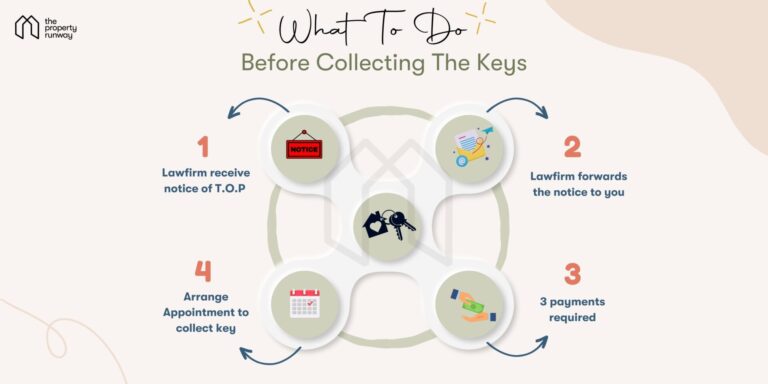
1 – The Law Firm Will Notify You On Payment & Key Collection
If you have not already received the email or letter from your law firm informing you about the key collection, this is the usual process you will go through.
- Your Law Firm will receive from the Developer’s Law Firm a notice of T.O.P., which states that the development is now ready to be occupied and you can begin to arrange for key collection.
- Your Law Firm will then forward the notice to you along with the steps that you have to perform.
- You will need to make 3 payments at this stage, the surveyor’s fee, the six-month upfront maintenance fee and the 25% payment to the developer upon T.O.P.
Once the payment has been made, you will be able to arrange an appointment with the developer to collect the keys to your new unit!
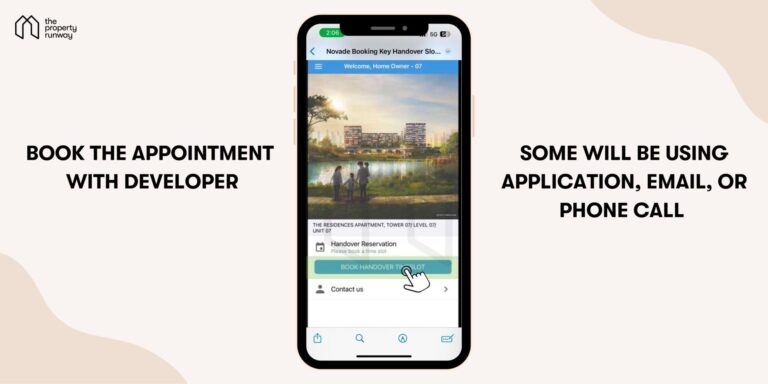
2 – Book a Key Collection Appointment
Some developers will arrange for you to book an appointment for key collection using an app, and others might allow you to make an appointment by emailing the admin in charge or just by a phone call.
Whichever the process, you will be able to book the earliest appointment for key collection.
If you happen to be travelling during the key collection period, you can also authorise another person to collect the keys on your behalf. There will be an authorisation form that can be filled out to authorise the person who will collect the keys on your behalf.
Make sure however to inform the developer beforehand that you are authorising another person to collect the keys on your behalf, you will need to prepare certain documents to collect the keys too.
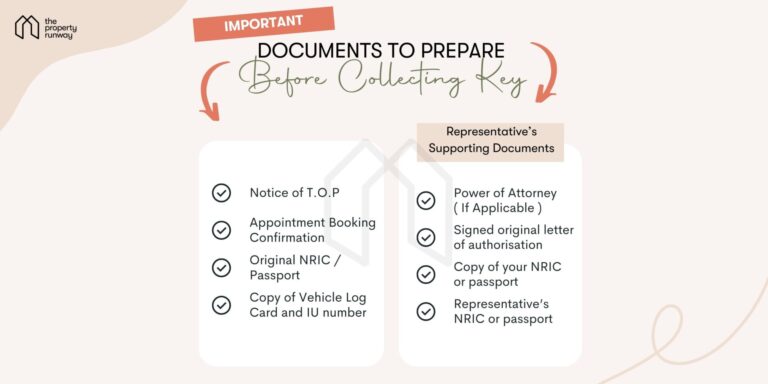
3 – Prepare The Documents Needed For Key Collection!
These are the Usual Documents Required:
- Notice of T.O.P. from the developer’s Lawfirm ( Emailed to you from your Lawfirm )
- Key collection appointment booking confirmation
- Original NRIC or Passport
- Copy of Vehicle Log Card and IU number ( To register your vehicle for entry )
If your representative is collecting the keys on your behalf, some other documents might include:
- Original letter of authorisation signed by you
- Copy of your NRIC or passport
- Representative’s NRIC or passport
- Power of Attorney ( If Applicable )
Different developers might request different documents, so it is best to check the letters you received from the developer on the exact documents needed!
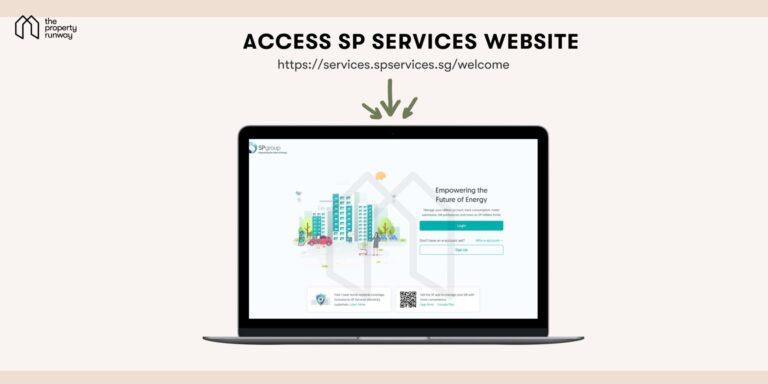
4 – Apply For Utilities
Go to SP services website or download their mobile app if you have not.
Open a new utility account and book the turn-on appointment on the same day as your key collection, but an hour later so you will have time to be there to open the door.
The appointment dates are usually available 10-14 days in advance, so make sure you time it together with your key collection. If your key collection is too early, you might not be able to get an appointment on the same day.

5 – Book A Defects Specialist
Lastly, get a defects specialist to come down to check on the unit. We recommend hiring a vendor as they have special tools to check things such as the evenness of the ground and the hollowness in the walls.
Their inspection covers areas which are accessible and include:
- Plumbing, sanitary and drainage including water ponding
- Electrical points and appliances
- Aircon system
- Floor, walls, ceilings, including water seepage, lippage, unevenness
- Tile hollowness and floor delamination
- Doors, windows, fixtures and fittings check for installation, functionality and general build quality
- Carpentry works
- Structural integrity and problems
- General cosmetic defects and alignment issues
You can also choose to do the defects check on your own too!
You would want to do this as soon as possible as the developer will only have a small workforce to rectify defects. It will usually take around 3 weeks to 1 month to rectify all the defects, depending on the severity of it.
The earlier you do it, the earlier they can rectify it for you.
But do take note that some defects might take longer to rectify as there may be a shortage of parts and materials. For example, glass panels might take longer to arrive as some developers order the materials from another country.
Finally, get your pineapple ready for your key collection day!
PRO TIP!
To save you from making multiple trips down, choose a date and time whereby you can do all these at the same time – Key Collection, SP Services as well as Defects Specialist.
Here’s a sample of our client’s scheduling, so she only had to make ONE trip down
2 pm – Key Collection Appointment
3 pm – SP Services Arrives To Open Utility (Owner / Power Of Attorney must be around)
3.30 pm – Defects Specialist Arrives
Key collection day!
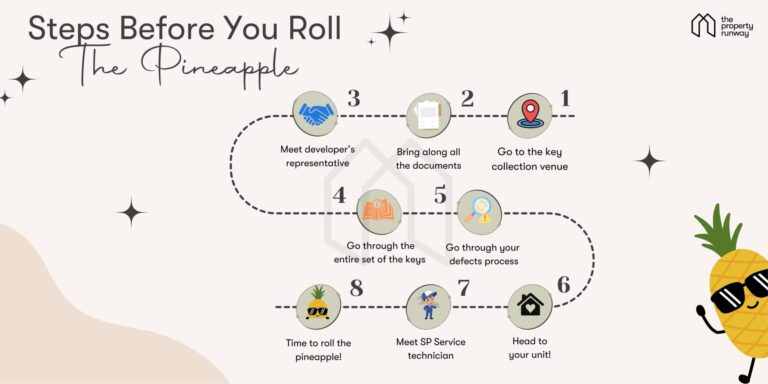
You would have received instructions from the developer about where the key collection is taking place.
Usually, it will be in the function rooms of the development.
If not, you can always follow the signs and directions that will be at the entrance or in the car park to the Key Collection Room!
Bring along all the documents that are required for your key collection.
Once there, you will be greeted by a representative from the developer. They will go through with you the entire set of keys for your unit, the warranty for the appliances and how to register for them and also a manual for your unit.
The manual will include all the structural drawings and floor plans and the user manual for the appliances.
It might also include some application forms to apply for parking labels and registration of your phone number for the telephony system if your property has it.
They will also go through the defects inspection and reporting process and provide you with the method to contact their team for it.
After Key Collection
Now is the time to head to your unit!
Before stepping into the unit, roll the pineapple to bless your new property! Congratulations once again! Take a moment to enjoy and relish this moment!
By the way, if you have arranged for your utilities to be turned on, this is when you will meet the technician who will help to turn on the supply for you.
When the power & water supply is switched on, your defects team will be able to do a thorough check of the unit and report the defects to the developer’s team on your behalf.
In The Weeks to Come
Other than dropping by often to admire your new home and perhaps use the facilities, keep in mind to follow up with the defects team to quickly finish up the inspection and rectification works.
Do not be surprised to see a ton of post-its everywhere as the defect specialist can point out even the smallest of scratches on the laminates.
It might take a while to finish the work depending on the number of defects and the earlier you finish, the earlier you can start your renovations.
Make sure only to start your renovations AFTER the defects reported have been jointly inspected with the developer’s team. Otherwise, any defects after your ID or contractor has started work can be deemed to be caused by your contractors and IDs.
Renovations MAY include:
– Lights and ceiling Fans installation
– False Ceiling or Feature Walls
– Curtains / Blinds fittings
Conclusion

As you navigate this exciting journey, remember to take things one step at a time and trust in the process.
If you ever need any help with selling or renting out your newly TOP property, feel free to reach out to us. Our team is here to make the process seamless and stress-free for you! Let us take care of the details while you focus on enjoying the fruits of this new chapter of your life!
Once again, congratulations!